
Double-Dipped Crispy Fried Chicken Tenders
Golden, crunchy on the outside and tender and juicy on the inside, these Crispy Fried Chicken Tenders bring restaurant-style flavor straight to the home kitchen. Each strip is soaked in a flavorful buttermilk marinade, coated in seasoned flour, dipped again, and covered with a second layer for an extra-crunchy finish.
The secret is the double-dipping method. Instead of using just one layer of coating, the chicken gets two layers of seasoned breading that create craggy, crispy edges with every bite.
These homemade chicken fingers are perfect for lunch, dinner, game day, family gatherings, or a weekend comfort-food treat. Serve them hot with spicy mayo, honey mustard, barbecue sauce, or creamy garlic dip for a delicious meal everyone can enjoy.
Ingredients for Crispy Fried Chicken Tenders
This recipe uses everyday ingredients to create flavorful chicken with a crunchy coating. For the best results, prepare the marinade and breading before starting.
For the Chicken and Buttermilk Marinade
- 1½ lb (680g) boneless, skinless chicken breasts
- 1 cup (240ml) buttermilk
- 1 large egg
- 1 tbsp hot sauce, optional and alcohol-free
- 1 tsp salt
- 1 tsp paprika
- ½ tsp garlic powder
- ½ tsp onion powder
- ½ tsp black pepper
For the Double-Dipped Coating
- 2 cups (250g) all-purpose flour
- ½ cup (60g) cornstarch
- 1 tsp baking powder
- 1½ tsp paprika
- 1 tsp garlic powder
- 1 tsp onion powder
- 1 tsp salt
- ½ tsp black pepper
- ½ tsp cayenne pepper, optional
- ½–¾ cup (120–180ml) cold water, as needed to create crispy coating flakes
For the Final Dip
- ½ cup (120ml) buttermilk
- 1 large egg
For Frying
- 4–6 cups neutral cooking oil, such as canola or sunflower oil, depending on the size of the pot
Optional Spicy Mayo Sauce
- ½ cup mayonnaise
- 1–2 tbsp halal-friendly hot sauce
- 1 tsp lemon juice
- ¼ tsp garlic powder
- A pinch of salt
Tools and Equipment
- Cutting board and sharp knife
- Two medium mixing bowls
- One large shallow bowl or tray
- Whisk or fork
- Tongs
- Deep, heavy-bottomed pot or deep fryer
- Cooking thermometer
- Wire rack and baking tray
- Paper towels, if needed
Step-by-Step Instructions
1. Cut the Chicken into Tenders
Place the chicken breasts on a clean cutting board.
Cut them lengthwise into strips about 1 inch thick. Try to keep the pieces similar in size so they cook evenly.
If the chicken breasts are especially thick, slice them horizontally before cutting them into strips.
2. Prepare the Buttermilk Marinade
In a medium bowl, whisk together the buttermilk, egg, optional hot sauce, salt, paprika, garlic powder, onion powder, and black pepper.
Whisk until the mixture is smooth and the seasonings are evenly distributed.
Add the chicken strips and turn them until every piece is coated.
3. Marinate the Chicken
Cover the bowl and refrigerate for at least 30 minutes.
For a deeper flavor and tender texture, marinate the chicken for 2–4 hours. Avoid leaving it in the acidic marinade for excessively long periods, as the texture can become soft.
Keep the chicken refrigerated while it marinates.
4. Mix the Seasoned Flour
In a large shallow bowl, combine the flour, cornstarch, baking powder, paprika, garlic powder, onion powder, salt, black pepper, and optional cayenne pepper.
Whisk well to distribute the seasonings evenly.
The flour creates the main crust, while the cornstarch helps the coating become lighter and crispier.
5. Create Crispy Breading Flakes
This step helps produce the craggy texture associated with restaurant-style fried chicken.
Slowly drizzle ½ cup of cold water into the seasoned flour, rubbing the mixture gently with clean fingertips or a fork. Add a little more water only if needed.
The mixture should form small, irregular flakes rather than a smooth dough. These little clumps cling to the chicken and fry into extra-crunchy pieces.
6. Prepare the Final Dip
In a separate bowl, whisk together the additional buttermilk and egg.
This second dip helps the next layer of seasoned flour adhere to the chicken, creating a thicker coating.
Place the bowls in this order: marinated chicken, seasoned flour mixture, buttermilk-egg dip, and seasoned flour mixture again.
7. Coat the Chicken for the First Time
Remove one chicken strip from the marinade and allow the excess liquid to drip off.
Press it into the seasoned flour mixture, turning it several times to cover every side. Gently press some of the flour flakes onto the surface.
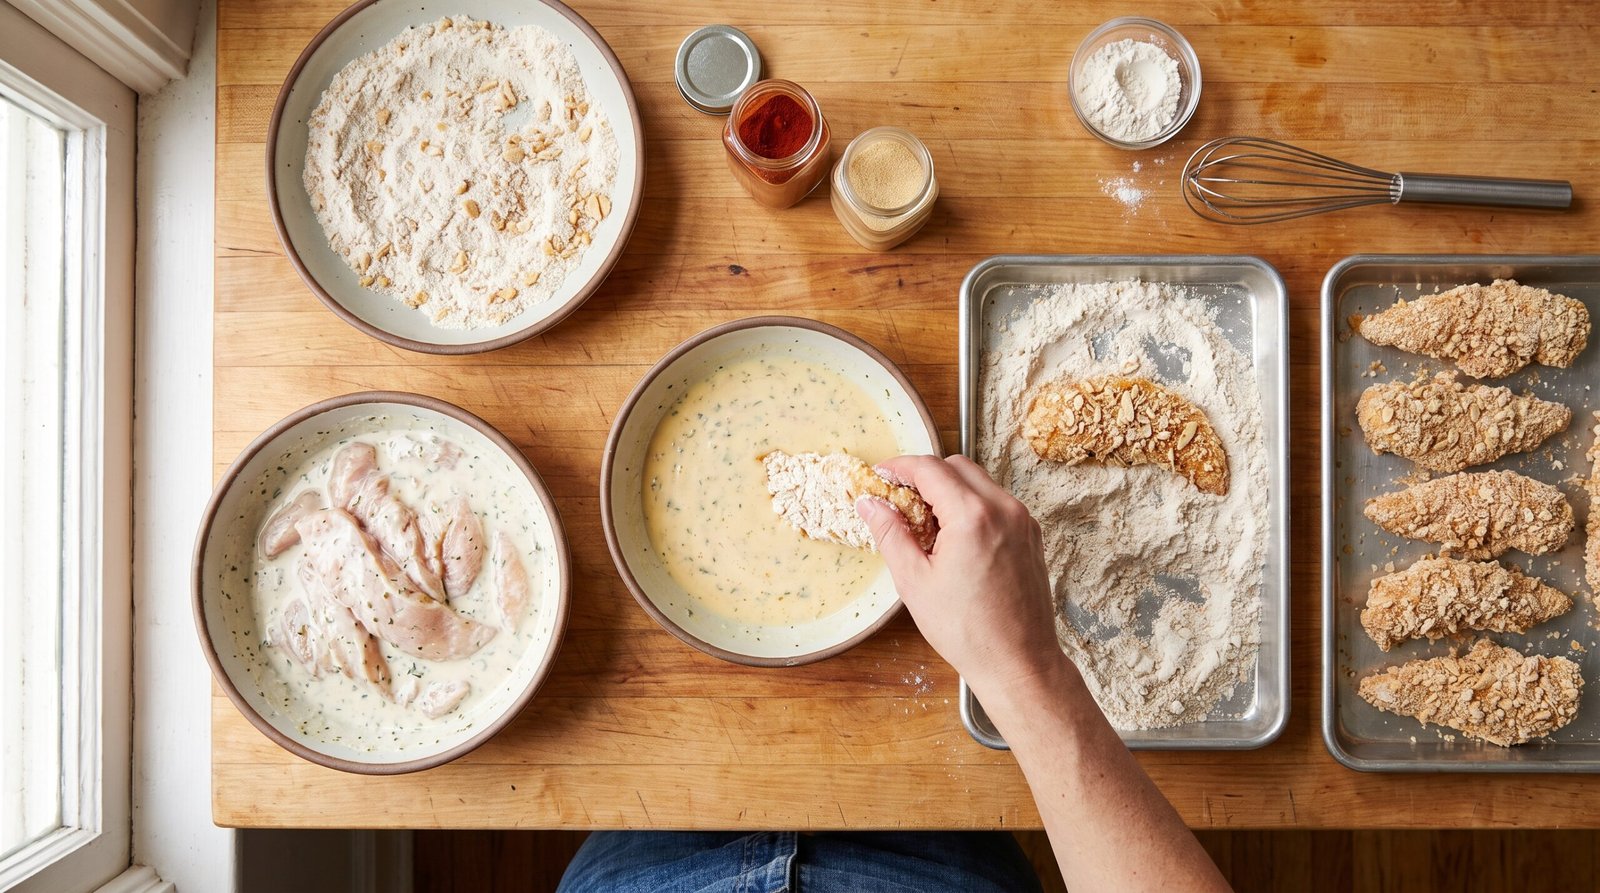
Place the coated strip on a clean tray and repeat with the remaining chicken.
8. Double-Dip for Extra Crunch
Dip each first-coated chicken strip into the final buttermilk-egg mixture.
Allow excess liquid to drip off, then return the strip to the seasoned flour.
Press the flour mixture firmly around the chicken, paying special attention to the edges and thicker sections.
Do not brush off all the little flour clumps. Those rough pieces create the crunchy, textured crust that makes double-dipped fried chicken special.
9. Heat the Oil
Pour enough oil into a deep, heavy-bottomed pot to allow the chicken strips to fry without touching the bottom. Do not fill the pot more than halfway.
Heat the oil to 350°F (175°C).
Use a cooking thermometer to check the temperature. If the oil is too cool, the coating can absorb excess oil. If it is too hot, the crust may brown before the chicken cooks through.
10. Fry the Chicken Tenders
Carefully lower a few coated chicken strips into the hot oil using tongs.
Fry in small batches for approximately 5–7 minutes, turning as needed, until the coating is deep golden brown and the thickest part of each tender reaches an internal temperature of 165°F (74°C).
Cooking time varies depending on the thickness of the chicken strips, so always check the internal temperature rather than relying on color alone.
Avoid overcrowding the pot, as adding too much chicken at once can lower the oil temperature.
11. Drain and Rest
Transfer the cooked chicken tenders to a wire rack set over a baking tray.
Let them rest for a few minutes before serving. A wire rack allows excess oil to drain while helping air circulate around the crust.
Avoid stacking the tenders while they are hot because trapped steam can soften the coating.
12. Make the Spicy Mayo
In a small bowl, combine the mayonnaise, hot sauce, lemon juice, garlic powder, and a pinch of salt.
Stir until smooth and creamy. Taste and add a little more hot sauce if a stronger kick is preferred.
Serve the warm chicken tenders immediately with the spicy mayo on the side.
Tips for the Crunchiest Fried Chicken Tenders
Use Buttermilk for Flavor and Tenderness
Buttermilk adds a mild tang and helps tenderize the chicken. The egg in the marinade also helps the mixture cling to the chicken.
If buttermilk is unavailable, mix 1 cup of milk with 1 tablespoon of lemon juice. Let it stand for 5–10 minutes before using.
Do Not Skip the Cornstarch
Cornstarch helps create a crisp, delicate coating. Combining it with all-purpose flour gives the crust a satisfying crunch without making it overly heavy.
Make Small Breading Clumps
Those rough flour flakes are an important part of the texture.
Drizzle cold water into the seasoned flour gradually and gently mix until small clumps form. Avoid adding too much water, which can make the mixture pasty.
Press the Coating onto the Chicken
Gently press the seasoned flour onto each tender during both coating stages.
This helps the breading adhere and creates more crunchy edges.
Maintain the Correct Oil Temperature
Keep the oil around 350°F (175°C), allowing for small fluctuations during frying.
If the temperature drops too far, wait for it to recover before adding the next batch.
Use a Wire Rack Instead of Stacking
A wire rack keeps the bottom of each tender from sitting in oil or trapped steam.
For the crispiest results, serve the chicken soon after frying.
Keep the Chicken Pieces Similar in Size
Chicken strips that are close in thickness cook more evenly. Smaller pieces may finish sooner, while thicker pieces need more time.
Always check that each piece reaches 165°F (74°C) in the center.
Easy Variations
Spicy Crispy Chicken Tenders
Add extra cayenne pepper to the flour mixture and a little additional hot sauce to the marinade.
Serve with spicy mayo for a flavorful, heat-filled version.
Garlic Parmesan Chicken Tenders
Mix 2–3 tablespoons of finely grated, halal-friendly Parmesan-style cheese into the seasoned flour.
After frying, sprinkle the tenders lightly with extra cheese and garlic powder while they are still warm. Watch the coating carefully because cheese can brown quickly.
Smoky BBQ Chicken Tenders
Add 1 teaspoon of smoked paprika to the flour mixture.
Serve with a halal-friendly, alcohol-free barbecue sauce for a sweet and smoky flavor.
Mild Family-Friendly Tenders
Leave out the cayenne pepper and hot sauce.
The paprika, garlic powder, and onion powder still give the coating plenty of flavor without making it spicy.
Air Fryer Version
For a lighter alternative, arrange the coated tenders in a single layer in a preheated air fryer basket.
Lightly spray the coating with cooking oil and air fry at 400°F (200°C), turning halfway through. Depending on thickness and the appliance, cooking may take around 10–15 minutes.
Check that the chicken reaches 165°F (74°C). The crust may be less rugged than deep-fried chicken, but it can still turn golden and crunchy.
Common Mistakes to Avoid
Skipping the resting time after coating: Allowing coated tenders to rest for about 5 minutes can help the breading adhere. Do not leave raw chicken sitting at room temperature for extended periods.
Using oil that is too cool: This can lead to greasy breading. Check the temperature between batches.
Overcrowding the pot: Too many tenders at once can lower the oil temperature and prevent even browning.
Making the coating too wet: The flour should have small flakes, not a thick paste. Add water slowly.
Serving the chicken on paper towels for too long: A wire rack is better for maintaining crunch because it allows air to circulate.
Cutting the chicken too thick: Very thick strips take longer to cook and may brown before the center is ready. Keep the pieces relatively even.
Storage and Serving
How to Store Leftovers
Let the chicken cool slightly, then refrigerate it in an airtight container within 2 hours of cooking.
Store leftovers in the refrigerator for 3–4 days. Keep dipping sauces in separate containers so the coating does not become soggy.
Can Fried Chicken Tenders Be Frozen?
Yes. Once cooked and cooled, arrange the tenders in a single layer and freeze until firm.
Transfer them to a freezer-safe bag or container and use within 2–3 months for the best quality. Label the container with the date.
How to Reheat Chicken Tenders
For a crispy finish, reheat refrigerated tenders in an oven at 375°F (190°C) for approximately 8–12 minutes, or until heated through.
An air fryer also works well at around 375°F (190°C). Reheating time depends on the size and thickness of the pieces.
For food safety, reheat leftovers to 165°F (74°C). Avoid reheating the same portion repeatedly.
What to Serve with Chicken Tenders
These crunchy tenders pair well with:
- Crispy French fries or potato wedges
- Creamy coleslaw
- Corn on the cob
- Fresh garden salad
- Potato salad
- Buttered corn
- Toasted sandwich rolls
- Pickles and sliced tomatoes
For a complete comfort-food meal, serve them with Crispy Fried Potato Bread or add Chicken Alfredo Tacos to a weekend recipe menu.
Frequently Asked Questions
Why are my fried chicken tenders not crispy?
The most common causes are oil that is too cool, overcrowding the pot, or trapped steam after frying. Maintain the oil temperature and place cooked tenders on a wire rack.
Can chicken tenders be marinated overnight?
A short overnight marinade may work, but prolonged exposure to acidic ingredients can affect the chicken’s texture. For this recipe, 2–4 hours is a good practical range.
Is buttermilk necessary for fried chicken?
Buttermilk helps tenderize the chicken and adds flavor, but it is not essential. Milk mixed with lemon juice can be used as a simple substitute.
Can chicken thighs be used instead of chicken breasts?
Yes. Boneless, skinless chicken thighs can be cut into strips and used in the same way. Their richer flavor and higher fat content can create a particularly juicy result, although cooking times may vary.
How can the coating stay attached during frying?
Allow excess marinade to drip off, press the flour mixture firmly onto the chicken, and handle the coated strips gently. A brief rest before frying can also help the breading settle.
What oil is best for deep frying chicken tenders?
Canola, sunflower, and other neutral oils suitable for high-heat cooking work well. Choose an oil with a high smoke point and avoid letting it smoke.
Can the chicken be prepared ahead of time?
The chicken can be marinated in advance and kept refrigerated. For the best crust, coat the chicken shortly before frying rather than leaving the fully breaded strips sitting for hours.
How do you know when chicken tenders are fully cooked?
Use a food thermometer to check the thickest part of the chicken. It should reach 165°F (74°C). The outside may become golden before the center is fully cooked, so color alone is not a reliable indicator.
Can gluten-free flour be used?
A gluten-free all-purpose flour blend and gluten-free cornstarch can be used, provided the products are suitable for frying. Use gluten-free ingredients throughout and check their labels for cross-contact warnings if needed.
What is the best sauce for crispy fried chicken?
Spicy mayo is an excellent option because its creamy texture complements the crunchy coating. Honey mustard, garlic mayo, ketchup, and halal-friendly barbecue sauce also pair well with fried chicken.
Conclusion
These Crispy Fried Chicken Tenders deliver everything that makes homemade fried chicken irresistible: a golden, craggy crust, tender chicken, and plenty of seasoning in every bite.
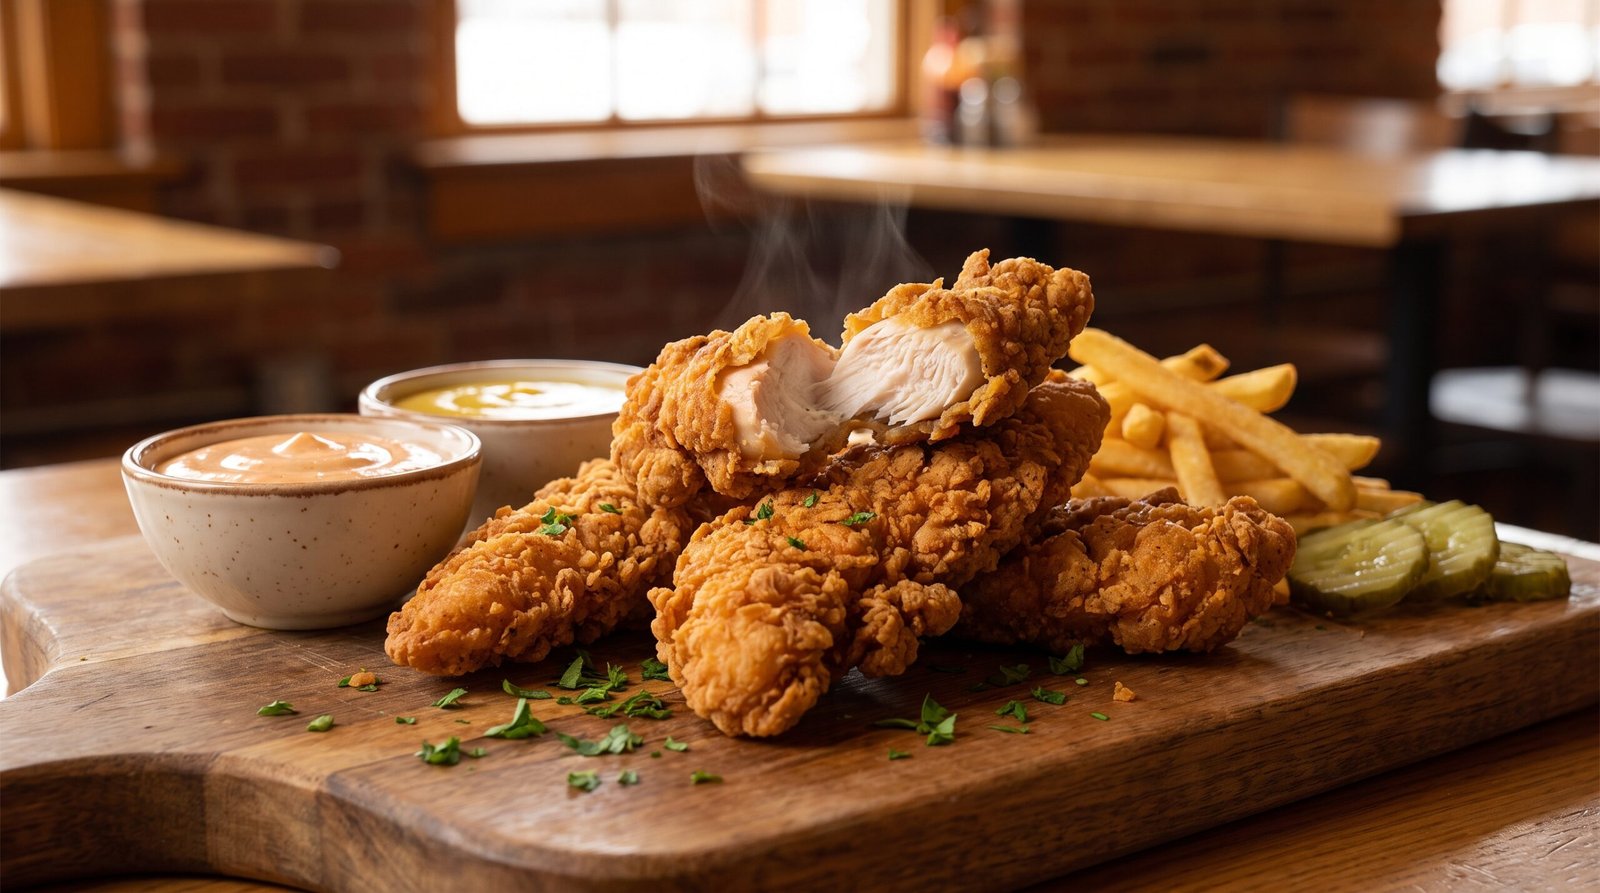
The double-dipping technique creates extra layers of crunch, while the buttermilk marinade helps keep the chicken flavorful and juicy. Serve the tenders with creamy spicy mayo, crispy fries, and fresh pickles for a satisfying meal.
With simple ingredients and clear steps, this crunchy fried chicken recipe is a great choice for beginners, busy home cooks, and anyone craving restaurant-style chicken at home. Try the recipe, choose a favorite dipping sauce, and share these homemade chicken fingers with family and friends
Leave a Reply