
Chocolate-Dipped Cookie Dough Bites
Imagine soft, sweet cookie dough wrapped in a smooth chocolate shell. These Chocolate-Dipped Cookie Dough Bites deliver that classic cookie dough flavor in a small, delicious treat without turning on the oven.
Each bite combines a creamy brown sugar dough, mini chocolate chips, and a rich chocolate coating. The texture is soft and slightly chewy inside, with a satisfying chocolate snap on the outside.
These Cookie Dough Bites are perfect for dessert platters, birthday parties, holiday treats, or a quick sweet snack from the refrigerator. They are easy to prepare with everyday ingredients and require no baking after the dough is made.
The secret is using heat-treated flour and leaving out raw eggs. This creates edible cookie dough designed to be enjoyed without baking. Once the dough balls are chilled and dipped in chocolate, they become delicious little cookie dough truffles that look as good as they taste.
Ingredients
For the Cookie Dough
- 1 cup all-purpose flour, heat-treated and cooled
- 1/2 cup unsalted butter, softened
- 1/2 cup packed light brown sugar
- 2 tablespoons granulated sugar
- 2 tablespoons milk
- 1 teaspoon vanilla extract
- 1/4 teaspoon salt
- 1/2 cup mini chocolate chips
For the Chocolate Coating
- 10 ounces semi-sweet chocolate, chopped, or chocolate melting wafers
- 1 teaspoon coconut oil, optional, to help thin the chocolate
Choose chocolate and flavoring products with alcohol-free ingredients. Check labels when necessary, especially for vanilla flavoring and chocolate products.
Tools and Equipment
- Mixing bowl
- Hand mixer or sturdy wooden spoon
- Measuring cups and spoons
- Microwave-safe bowl or heatproof bowl
- Baking sheet or flat tray
- Parchment paper
- Spatula
- Small cookie scoop or tablespoon
- Fork or dipping tool
- Food thermometer, if available for heat-treating flour
Step-by-Step Instructions
1. Heat-Treat the Flour
Raw flour can contain harmful bacteria, so it should not be used directly in edible cookie dough.
To heat-treat the flour in the oven, preheat the oven to 350°F (175°C). Spread the flour in an even layer on a parchment-lined baking sheet.
Bake for about 5–7 minutes, checking that the flour reaches 165°F (74°C). Stir carefully and allow it to cool completely before using.
Alternatively, use a microwave-safe bowl and heat the flour in short intervals, stirring between each interval. Check the temperature in several places to ensure it reaches 165°F (74°C).
Avoid tasting the flour before it has been heat-treated. Once cooled, break up any lumps and measure the amount needed for the recipe.
2. Cream the Butter and Sugars
Place the softened butter, brown sugar, and granulated sugar in a mixing bowl.
Beat with a hand mixer or stir firmly with a wooden spoon until the mixture looks smooth and creamy.
The brown sugar adds a warm, caramel-like flavor, while the granulated sugar gives the dough a familiar cookie sweetness.
3. Add the Milk and Vanilla
Pour in the milk and alcohol-free vanilla extract.
Mix until everything is well combined. The mixture may look slightly loose at this stage, but the flour will help bring it together.
4. Add the Flour and Salt
Add the cooled, heat-treated flour and salt to the butter mixture.
Stir gently until a soft dough forms. Scrape down the sides of the bowl to make sure no dry flour remains.
If the dough seems too dry or crumbly, add milk a teaspoon at a time. If it feels too sticky, chill it for 10–15 minutes before shaping.
5. Fold in the Chocolate Chips
Add the mini chocolate chips to the dough.
Fold them in with a spatula until evenly distributed. Mini chips work especially well because they spread throughout the small bites without making them difficult to shape.
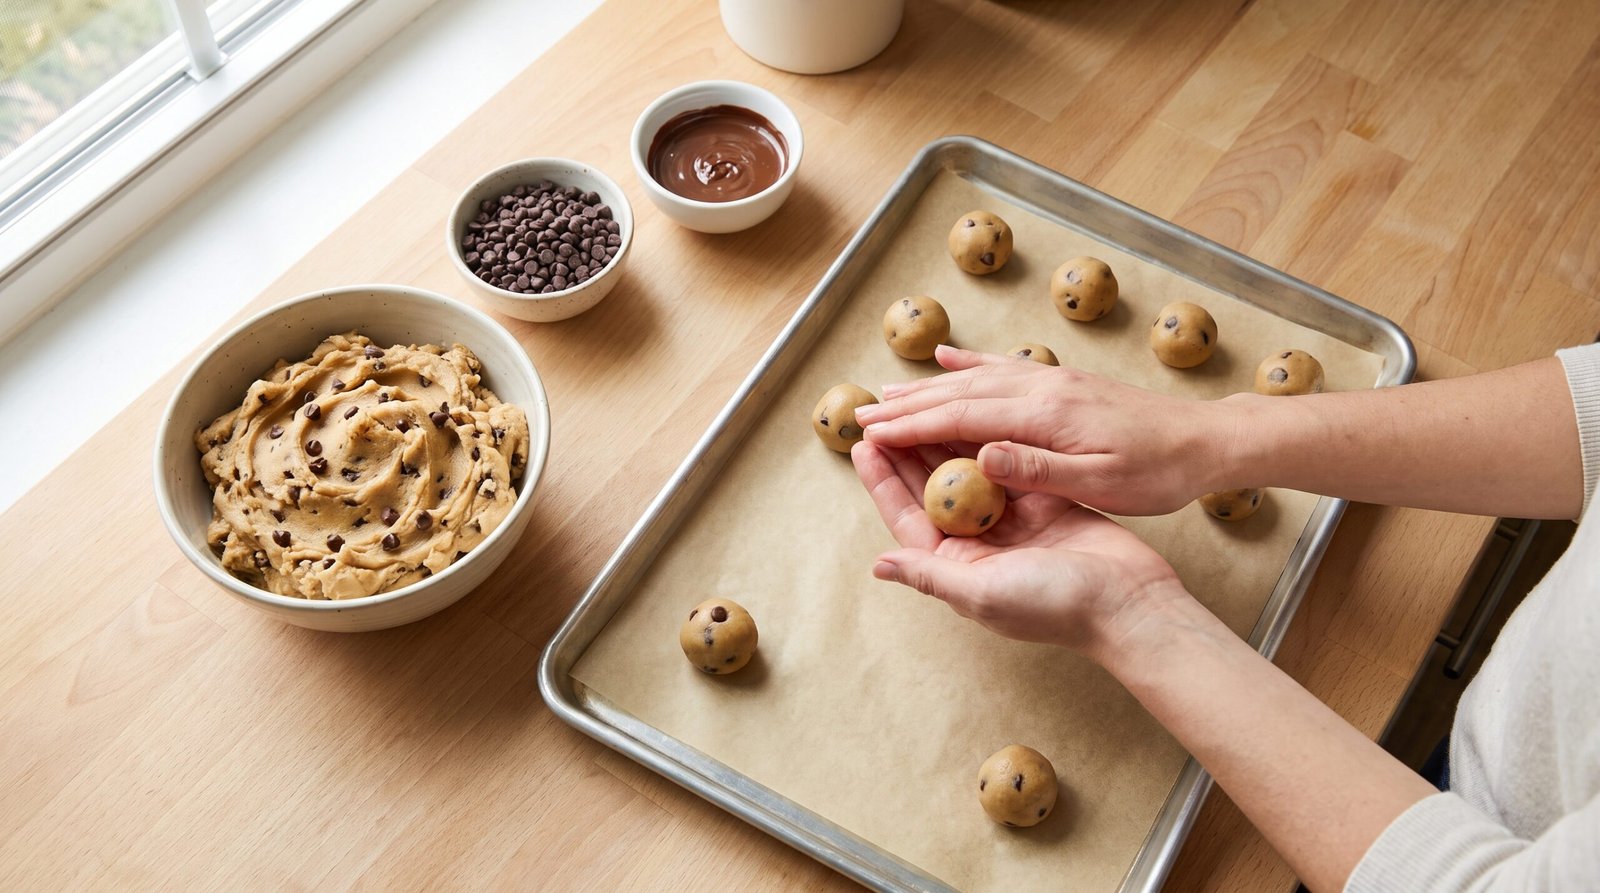
6. Shape the Cookie Dough Balls
Line a baking sheet or flat tray with parchment paper.
Scoop approximately 1 tablespoon of dough at a time and roll it gently between your palms to create a small ball.
Place each ball on the prepared tray, leaving a little space between them. Repeat until all the dough has been shaped.
For evenly sized Cookie Dough Bites, use the same scoop or measuring spoon for every portion.
7. Chill the Dough Balls
Place the tray in the refrigerator for 30–45 minutes, or until the dough balls feel firm.
Chilling helps the bites hold their shape during dipping. It also makes the chocolate coating easier to apply without the dough becoming soft.
If the dough balls are still delicate, leave them in the refrigerator a little longer.
8. Melt the Chocolate
Place the chopped chocolate or melting wafers in a microwave-safe bowl.
Microwave in 20-second intervals, stirring thoroughly after each interval. Continue until the chocolate is mostly melted, then stir until smooth.
If needed, mix in 1 teaspoon of coconut oil to make the coating a little thinner. This is optional and can be skipped when using chocolate that already melts smoothly.
Avoid overheating the chocolate, as it can become thick or grainy.
9. Dip the Cookie Dough Bites
Remove a few chilled dough balls from the refrigerator at a time.
Place one ball into the melted chocolate and turn it gently with a fork until fully coated. Lift it out and allow excess chocolate to drip back into the bowl.
Place the coated bite on the parchment-lined tray. Use a toothpick or another fork to help slide it off the dipping fork if necessary.
Repeat with the remaining dough balls, reheating the chocolate briefly if it becomes too thick.
10. Add Optional Decorations
For a simple finish, leave the chocolate coating smooth.
For a decorative touch, sprinkle a few mini chocolate chips over the coating before it sets. A small drizzle of melted contrasting chocolate can also create an attractive pattern.
Keep decorations simple so the rich chocolate shell and cookie dough center remain the main features.
11. Chill Until Set
Place the tray in the refrigerator for about 15–25 minutes, or until the chocolate coating is firm.
Once set, transfer the bites to an airtight container.
Keep them refrigerated until ready to serve so the dough stays firm and the chocolate coating holds its shape.
12. Serve and Enjoy
Arrange the chilled Cookie Dough Bites on a small dessert plate or serving tray.
For the best texture, serve them cool rather than frozen solid. The chocolate shell should be firm, while the inside remains soft and creamy.
These bite-sized treats are delicious on their own and also make a lovely addition to dessert platters.
Tips & Variations
Always Heat-Treat the Flour
This is the most important food-safety step in the recipe. Raw flour is not ready-to-eat, even if it looks clean or smells fresh.
Make sure the flour reaches 165°F (74°C), allow it to cool, and only then mix it into the dough.
Do Not Add Eggs
This recipe is designed to be egg-free. Eggs are not necessary for the soft, rich texture of edible cookie dough.
Adding raw eggs would introduce another food-safety concern and change the consistency.
Use Softened Butter
Butter should be soft enough to mix easily but not melted.
Melted butter can make the dough greasy and difficult to roll. If the butter becomes too warm, refrigerate the mixture briefly before shaping.
Adjust the Dough Consistency
Different flour brands and measuring methods can affect how the dough feels.
If it is crumbly, add milk a teaspoon at a time. If it is too sticky, refrigerate it before adding more flour so the dough has time to firm up.
Choose Mini Chocolate Chips
Mini chocolate chips create a more even distribution of chocolate throughout the dough.
Regular chocolate chips can be used, but smaller pieces make shaping and dipping easier.
Use Good Melting Chocolate
Chocolate melting wafers are convenient because they are designed to melt smoothly.
Good-quality semi-sweet chocolate also works well. If the coating becomes too thick, a small amount of coconut oil can help loosen it.
Keep the Dough Balls Cold
Cold dough balls are easier to dip and less likely to soften in the warm chocolate.
Work in small batches, keeping the remaining balls in the refrigerator while dipping.
Avoid Water in the Chocolate
Even a small amount of water can cause melted chocolate to seize and become grainy.
Make sure bowls, utensils, and dipping tools are dry before they touch the melted chocolate.
Try Different Chocolate Coatings
Semi-sweet chocolate creates a balanced coating that is not overly sweet.
Milk chocolate gives the bites a sweeter flavor, while dark chocolate provides a richer, more intense finish. Choose an alcohol-free product suitable for your dietary requirements.
Make a Cookies-and-Cream Version
Replace the mini chocolate chips with finely crushed chocolate sandwich cookies.
Fold the crumbs into the dough and dip the finished balls in white chocolate-style melting wafers, checking the product label for suitable ingredients.
Add a Peanut Butter Twist
For a peanut butter variation, replace 1 tablespoon of butter with 1 tablespoon of smooth peanut butter.
The dough may become slightly softer, so chill it well before shaping. Check for peanut allergies before serving.
Make Them Nut-Free
Simply leave out nuts and nut butters.
Check the chocolate and other packaged ingredients for allergy warnings if the bites will be served to guests with food allergies.
Create a Festive Finish
Decorate the chocolate coating with colored sprinkles or a drizzle of white chocolate-style coating.
Choose decorations that fit the occasion and check their ingredients if alcohol-free preparation is required.
Keep the Recipe No-Bake
Once the flour has been safely heat-treated, the cookie dough does not need to be baked.
The finished bites simply need refrigeration to firm up the dough and set the chocolate coating.

Storage & Serving
How to Store Cookie Dough Bites
Place the finished bites in an airtight container and refrigerate them.
They are best enjoyed within 5–7 days for freshness and texture. Keep them chilled between servings, especially in a warm room.
If stacking the bites, separate the layers with parchment paper to help prevent sticking.
Can Cookie Dough Bites Be Frozen?
Yes. Arrange the finished bites in a single layer on a tray and freeze until firm.
Transfer them to a freezer-safe container, separating layers with parchment paper. For best quality, enjoy them within about 2 months.
Thaw the bites in the refrigerator before serving. Avoid leaving them at room temperature for extended periods.
Can They Be Made Ahead?
Yes. These treats are convenient for preparing ahead of a party or family gathering.
Make the dough balls, dip them in chocolate, and refrigerate them until needed. Adding decorations before the chocolate sets helps them stick securely.
What to Serve with Cookie Dough Bites
Serve these chocolate-covered treats with coffee, tea, or a glass of cold milk.
They also pair well with fresh strawberries, raspberries, or sliced bananas. For dessert platters, arrange them alongside brownies, mini cookies, or other bite-sized sweets.
For more sweet treats, add easy no-bake dessert recipes to the dessert table [internal link].
A platter of homemade chocolate desserts [internal link] can make a lovely centerpiece for celebrations.
For another simple treat, serve them with soft chocolate chip cookies [internal link].
Frequently Asked Questions
Are Cookie Dough Bites safe to eat without baking?
They can be prepared for eating without baking when the flour is heat-treated properly and the recipe contains no raw eggs. Follow safe handling and refrigeration practices.
Why is the cookie dough too crumbly?
The dough may need a little more moisture, or the flour may have been measured too heavily.
Add milk one teaspoon at a time and mix until the dough holds together without becoming sticky.
Why is the chocolate coating too thick?
The chocolate may have overheated or cooled too much.
Warm it gently in short intervals, stirring well. A small amount of coconut oil can also help thin the coating.
Can these bites be made without dairy?
A dairy-free butter alternative, plant-based milk, and suitable dairy-free chocolate can be used.
Check product labels carefully and choose ingredients that meet the needs of anyone eating the treats.
Can regular chocolate chips be used for dipping?
Yes, but some chocolate chips contain stabilizers that make the melted chocolate thicker.
Melting wafers or chopped baking chocolate may provide a smoother coating. Add a little coconut oil if needed.
Do Cookie Dough Bites need to stay refrigerated?
Yes. Refrigeration helps preserve the dough’s texture and keeps the finished bites firm.
Return them to the refrigerator after serving rather than leaving them out for long periods.
Can the dough be made without brown sugar?
Yes. Granulated sugar can replace the brown sugar, although the flavor will be less caramel-like.
The texture may also be slightly different. Mix thoroughly to avoid a gritty result.
How can the bites be made smaller?
Use a teaspoon of dough for each ball instead of a tablespoon.
Smaller bites are easy to serve at parties and require less chocolate for coating.
Can the chocolate coating be decorated?
Yes. Add sprinkles, mini chocolate chips, or a contrasting chocolate drizzle before the coating sets.
For a neat finish, let excess chocolate drip off before placing each bite on the tray.
Can the recipe be doubled?
Yes. Double each ingredient and prepare the dough in a large mixing bowl.
Work in batches when dipping so the dough stays chilled and the melted chocolate remains smooth.
Conclusion
Chocolate-Dipped Cookie Dough Bites are a simple, delicious way to enjoy the sweet flavor of cookie dough without baking a full batch of cookies.
The soft brown sugar center, mini chocolate chips, and smooth chocolate shell create a satisfying combination of creamy and rich textures. With a few everyday ingredients and some chilling time, these no-bake treats are easy enough for beginners and special enough for celebrations.
Prepare a batch for a party, share them with family and friends, or keep a few in the refrigerator for a sweet treat. These Cookie Dough Bites are sure to become a favorite for anyone who loves chocolate and classic cookie dough flavor.
Leave a Reply