
Crispy Battered Chicken Tenders
Golden, crunchy, and tender inside, these Crispy Battered Chicken Tenders are a homemade favorite that brings restaurant-style flavor straight to the kitchen.
Each strip is coated in a lightly seasoned batter that fries into a crisp, golden shell. Inside, the chicken stays juicy and flavorful, making every bite satisfying without requiring complicated ingredients or techniques.
These Chicken Tenders are ideal for busy weeknights, family lunches, casual parties, or a fun weekend meal. Serve them with fries, coleslaw, or a favorite dipping sauce for a comforting meal everyone can enjoy.
The recipe uses simple pantry seasonings, an easy batter, and boneless chicken breast. A short marinating period helps the chicken stay tender, while frying at the right temperature creates the crunchy outside that makes homemade chicken tenders so appealing.
Ingredients
For the Chicken
- 1 1/2 pounds boneless, skinless chicken breasts
- 1/2 cup buttermilk
- 1 teaspoon garlic powder
- 1 teaspoon paprika
- 1/2 teaspoon onion powder
- 1/2 teaspoon salt
- 1/4 teaspoon black pepper
For the Crispy Batter
- 1 cup all-purpose flour
- 1/4 cup cornstarch
- 1 teaspoon baking powder
- 1 teaspoon paprika
- 1/2 teaspoon garlic powder
- 1/2 teaspoon onion powder
- 1/2 teaspoon salt
- 1/4 teaspoon black pepper
- 3/4 cup cold water, plus 1–2 tablespoons if needed
For Frying
- Vegetable oil or sunflower oil, as needed
Optional for Serving
- Ketchup
- Honey mustard made with alcohol-free ingredients
- Garlic mayonnaise
- Halal-friendly barbecue sauce
- Lemon wedges
- Fresh parsley, chopped
Tools and Equipment
- Cutting board
- Sharp knife
- Two mixing bowls
- Whisk
- Measuring cups and spoons
- Deep skillet or heavy-bottomed saucepan
- Kitchen tongs
- Wire rack or paper towel-lined plate
- Food thermometer, if available
Step-by-Step Instructions
1. Cut the Chicken into Strips
Place the chicken breasts on a clean cutting board.
Cut them lengthwise into strips about 1 inch wide. Try to keep the pieces similar in thickness so they cook evenly.
If a strip is especially thick, gently flatten it to an even thickness with the flat side of a meat mallet.
2. Season and Marinate the Chicken
Place the chicken strips in a mixing bowl.
Add the buttermilk, garlic powder, paprika, onion powder, salt, and black pepper. Toss until every strip is coated.
Cover and refrigerate for at least 20–30 minutes. For a deeper flavor, the chicken can be marinated for up to 4 hours.
3. Mix the Dry Batter Ingredients
In a separate bowl, combine the flour, cornstarch, baking powder, paprika, garlic powder, onion powder, salt, and black pepper.
Whisk well so the seasonings are evenly distributed.
Cornstarch helps create a lighter, crispier coating, while baking powder adds a little lift to the batter.
4. Add the Cold Water
Pour 3/4 cup cold water into the dry mixture.
Whisk until a smooth, thick batter forms. It should coat the back of a spoon without being so thick that it clumps heavily around the chicken.
If the batter seems too thick, add 1–2 tablespoons of cold water. Avoid making it too thin, as it may slide off the chicken.
5. Heat the Oil
Pour enough vegetable or sunflower oil into a deep skillet or saucepan to allow the chicken strips to fry without touching the bottom.
Heat the oil to approximately 350°F (175°C).
Use a food thermometer when possible. Maintaining the right temperature helps the batter become crisp without absorbing excess oil.
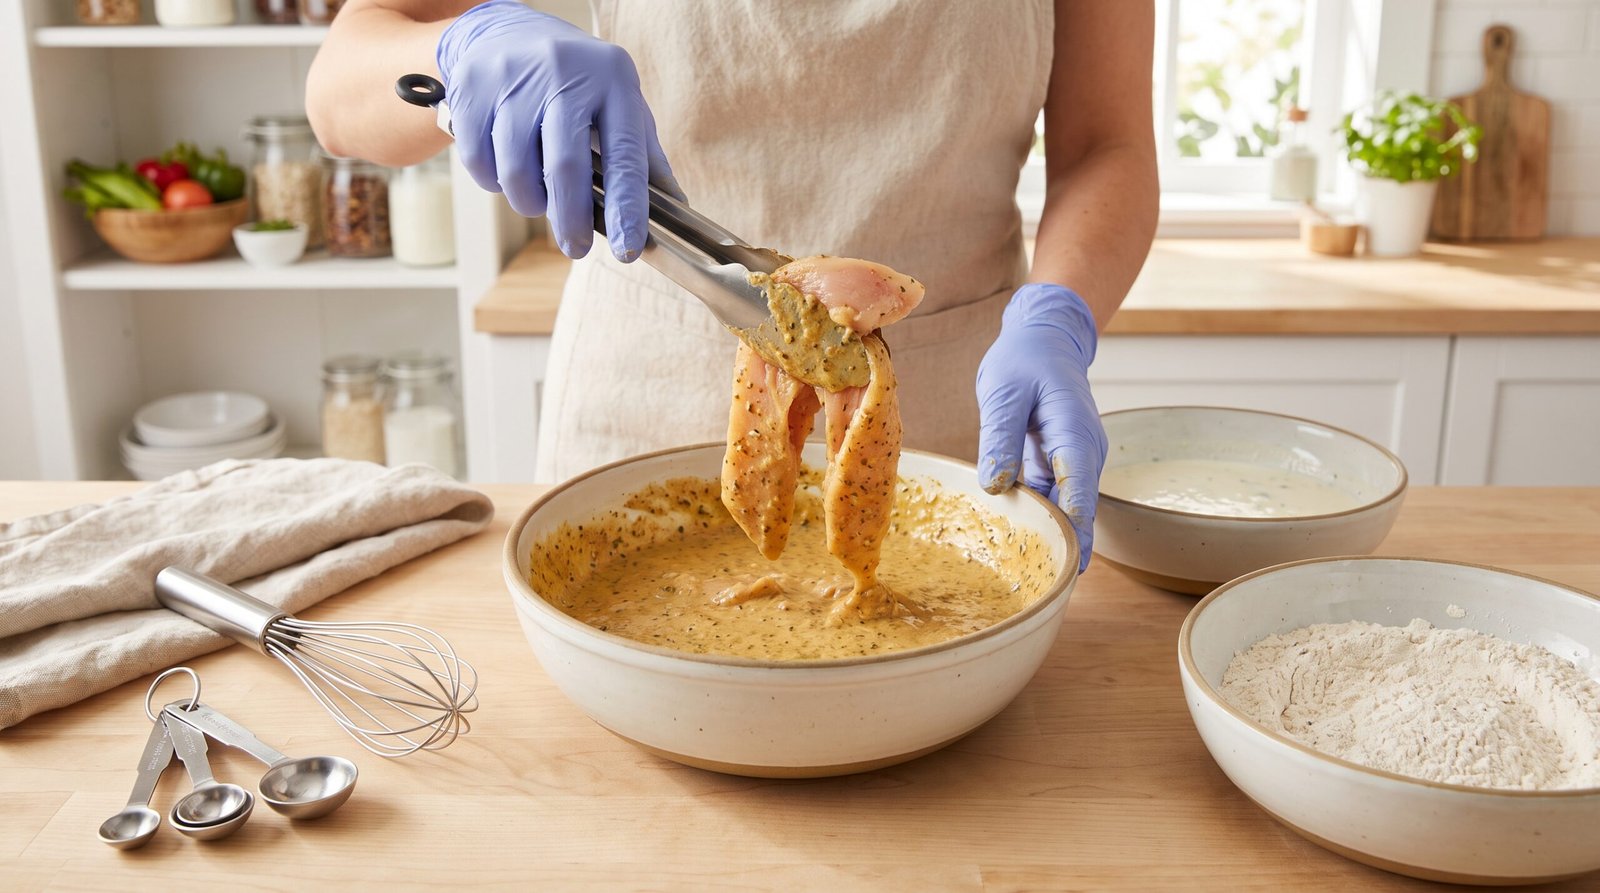
6. Dip the Chicken into the Batter
Remove one chicken strip from the buttermilk mixture, allowing excess liquid to drip away.
Dip it into the prepared batter and turn it until every side is covered.
Lift the strip carefully and allow excess batter to drip back into the bowl before frying.
Repeat with only a few strips at a time so the batter does not sit too long on the chicken.
7. Fry the Chicken Tenders
Carefully lower the battered chicken strips into the hot oil using tongs.
Fry in small batches, leaving space between the pieces. Overcrowding can lower the oil temperature and prevent the coating from crisping properly.
Cook for approximately 4–6 minutes, turning as needed, until the coating is golden brown and the chicken reaches an internal temperature of 165°F (74°C).
The exact cooking time depends on the thickness of the strips. Always use temperature rather than color alone to confirm doneness.
8. Drain the Tenders
Remove the cooked Chicken Tenders with tongs.
Place them on a wire rack set over a tray, or briefly on a paper towel-lined plate.
A wire rack allows excess oil to drain while air circulates around the coating, helping it stay crisp.
9. Finish the Remaining Batches
Continue battering and frying the remaining chicken strips.
Allow the oil to return to around 350°F (175°C) between batches. Adjust the heat as needed to prevent the coating from browning too quickly.
Avoid stacking the hot tenders, as trapped steam can soften the crunchy batter.
10. Serve While Hot
Transfer the tenders to a serving platter.
Add lemon wedges or chopped parsley if desired, and serve with ketchup, garlic mayonnaise, or another favorite dipping sauce.
For the best texture, serve immediately while the outside is crunchy and the chicken inside is juicy.
Tips & Variations
Cut the Chicken Evenly
Consistent thickness is important for even cooking.
Thin strips may cook too quickly, while thick pieces can brown on the outside before reaching a safe temperature in the center.
Aim for strips of similar size and flatten any unusually thick pieces.
Use Cold Water in the Batter
Cold water helps keep the batter from becoming overly warm before frying.
Mix the batter just before cooking and avoid leaving it at room temperature for long periods.
Do Not Overmix
Whisk until the ingredients are combined and the batter is mostly smooth.
Overmixing can make a flour-based batter tougher than necessary. A few tiny lumps are fine.
Keep the Oil Temperature Steady
Oil that is too cool can leave the coating greasy and heavy.
Oil that is too hot can burn the batter before the chicken cooks through. A thermometer is the easiest way to monitor the temperature.
Fry in Small Batches
Adding too many chicken strips at once can cause the oil temperature to drop.
Cook in manageable batches and let the oil recover between them. This gives each piece enough room to develop a golden, crispy exterior.
Use a Wire Rack for Draining
A wire rack helps keep the bottom of the batter from becoming soggy.
If using paper towels, avoid leaving the tenders piled on top of each other.
Add More Flavor to the Batter
For a spicier version, add 1/4 teaspoon cayenne pepper or a little chili powder.
For a smoky flavor, replace some of the regular paprika with smoked paprika. Dried herbs can also be added for a savory twist.
Make the Batter Thicker or Lighter
For a thicker coating, reduce the water slightly.
For a lighter coating, add water a teaspoon at a time until the batter falls from a spoon in a steady ribbon. Make small adjustments to avoid making it watery.
Try a Buttermilk Substitute
If buttermilk is unavailable, combine 1/2 cup milk with 1 1/2 teaspoons lemon juice.
Let it stand for about 5 minutes before adding the seasonings and chicken. This provides a simple substitute for the marinade.
Make Them Extra Crunchy
For a more textured coating, lightly sprinkle a little of the dry flour mixture into the wet batter and stir briefly to form small clumps.
These clumps can create additional crispy ridges when they stick to the chicken. Keep the batter manageable so it coats the strips evenly.
Try an Air-Fryer Version
The batter used for deep-frying is quite wet, so it is not ideal for a standard air fryer without modification.
For air frying, use a dry breading method instead: coat the marinated chicken in seasoned flour and breadcrumbs, spray lightly with oil, and cook in a single layer at around 400°F (200°C) until crisp and the center reaches 165°F (74°C).
Turn the pieces halfway through cooking. Times vary according to thickness and the appliance.
Make a Gluten-Free Version
Use a gluten-free all-purpose flour blend and certified gluten-free cornstarch.
The texture may differ slightly, so test a small piece first and adjust the batter thickness if needed.
Keep the Ingredients Halal-Friendly
Use fresh chicken and check packaged sauces and seasonings for alcohol-containing ingredients.
If serving with honey mustard, barbecue sauce, or mayonnaise-based dips, choose versions suitable for the dietary requirements of the guests.
Storage & Serving
How to Store Leftover Chicken Tenders
Allow the tenders to cool slightly, then place them in a shallow airtight container.
Refrigerate within 2 hours of cooking and keep at 40°F (4°C) or below. For best quality and safety, use the leftovers within 3–4 days.
Store dipping sauces separately so the batter does not become soggy.
How to Reheat Chicken Tenders
For the crispiest results, reheat the tenders in an oven or air fryer.
Preheat the oven to 375°F (190°C), or the air fryer to around 350°F (175°C). Heat until the coating is crisp and the chicken reaches 165°F (74°C) internally.
Avoid reheating for too long, as the chicken can dry out.
Can Chicken Tenders Be Frozen?
Yes. Cool the cooked tenders, arrange them in a single layer, and freeze until firm.
Transfer them to a freezer-safe container or bag, separating layers with parchment paper. For best quality, use within 2–3 months.
Reheat from frozen in an oven or air fryer until hot throughout and the center reaches 165°F (74°C).
What to Serve with Chicken Tenders
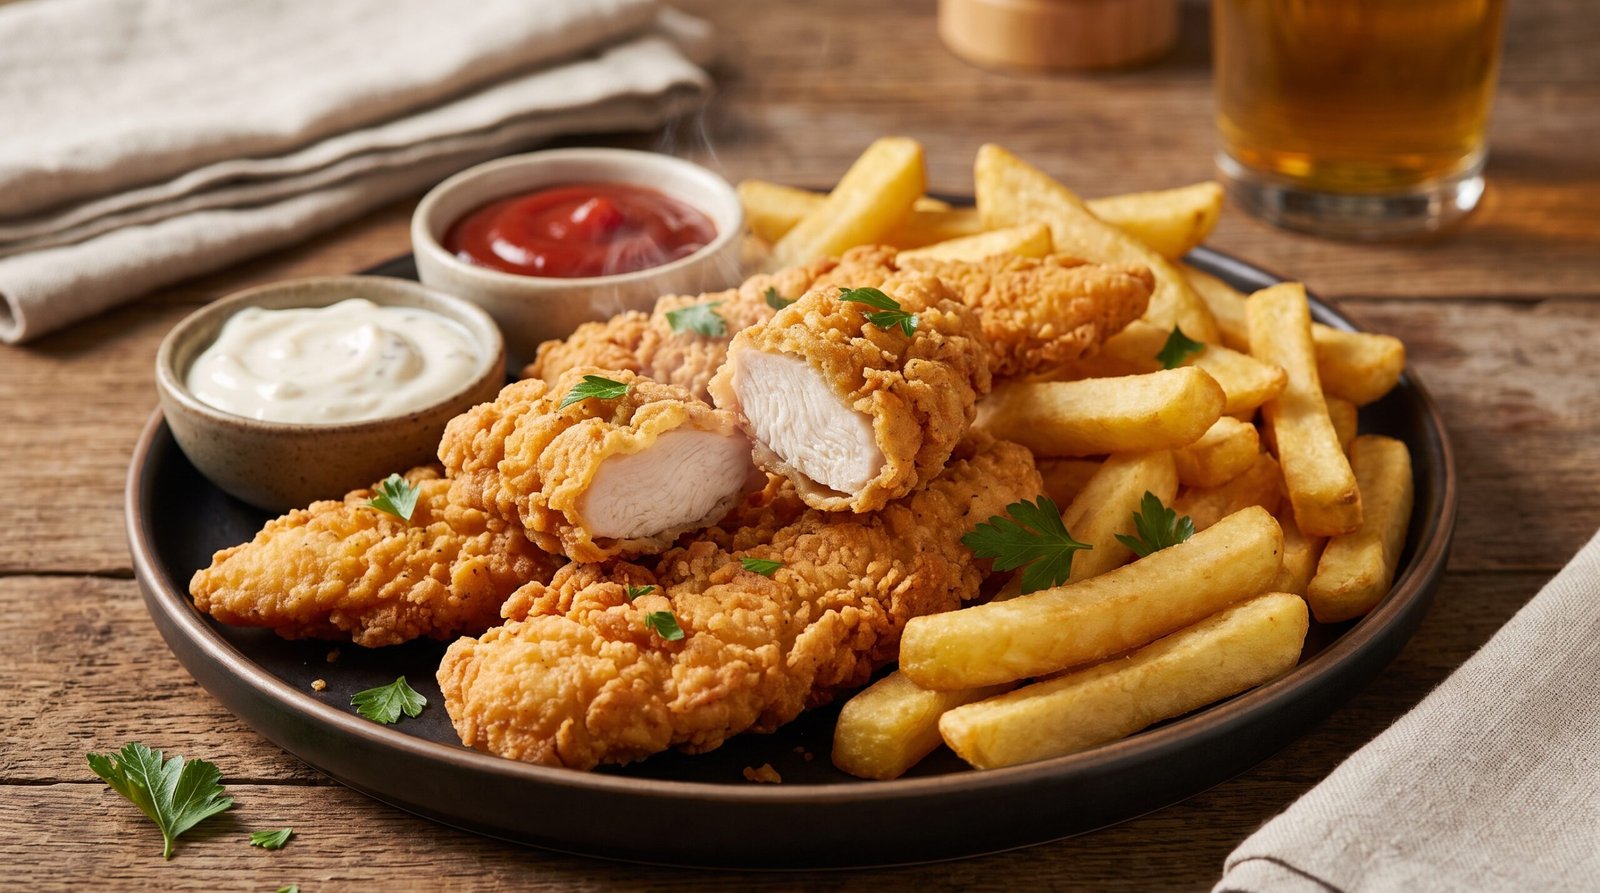
These crunchy chicken fingers pair well with classic comfort-food sides.
Try serving them with:
- Crispy French fries or potato wedges
- Creamy coleslaw
- Corn on the cob
- Fresh garden salad
- Macaroni and cheese
- Steamed or roasted vegetables
A selection of dipping sauces makes the meal even more enjoyable. Ketchup, garlic mayonnaise, honey mustard, and alcohol-free barbecue sauce are all delicious options.
For a party platter, serve the tenders with easy homemade potato wedges [internal link].
A bowl of creamy garlic dipping sauce [internal link] adds a rich, tangy contrast to the crispy batter.
For another family-friendly meal, pair them with simple homemade crispy appetizers [internal link].
Frequently Asked Questions
What is the difference between chicken tenders and chicken strips?
Chicken tenders can refer to the naturally tender strip of meat attached beneath each chicken breast, or to chicken breast cut into strips.
Chicken strips are usually cut from the breast itself. Both can be used for this recipe as long as the pieces are cut evenly.
Why is the batter falling off the chicken?
Excess marinade can prevent the batter from gripping the surface properly.
Allow extra marinade to drip off before dipping each strip, and avoid handling the battered chicken repeatedly before it enters the oil.
Can the batter be prepared in advance?
For the best texture, mix the batter shortly before frying.
The baking powder begins reacting once liquid is added, so letting the batter stand for too long may reduce its lightness.
Can boneless chicken thighs be used?
Yes. Boneless, skinless chicken thighs can be cut into strips and used instead of chicken breasts.
They tend to be richer and juicier, but their irregular shape may result in slightly different cooking times.
How do you know when chicken tenders are cooked?
Check the thickest part of a tender with a food thermometer.
Chicken is safe to eat when its internal temperature reaches 165°F (74°C). The coating may become golden before the center is fully cooked, so temperature is the most reliable check.
Can sparkling water replace regular water?
Yes. Cold sparkling water can be used in the batter and may produce a lighter texture.
Add it just before frying and mix gently. The finished result will still depend on the batter thickness and oil temperature.
Why are the tenders not crispy?
The oil may be too cool, the pan may be overcrowded, or the tenders may be stacked while hot.
Maintain the correct oil temperature, fry in small batches, and drain on a wire rack when possible.
Can the chicken be marinated overnight?
For this buttermilk marinade, a shorter period of 20 minutes to 4 hours is usually sufficient.
Keeping the chicken refrigerated during marinating is essential. Very long marinating periods can change the texture, so overnight marinating is not necessary for this recipe.
Can the tenders be made without buttermilk?
Yes. Use the milk-and-lemon-juice substitute described in the tips section, or use plain yogurt thinned with a little water until it has a buttermilk-like consistency.
How can the tenders stay crispy until serving?
Keep the cooked tenders in a single layer on a wire rack in a low oven, around 200°F (95°C), for a short time while finishing the remaining batches.
Do not cover them tightly, because trapped steam can soften the coating. Avoid holding cooked chicken at room temperature for extended periods.
Conclusion
Crispy Battered Chicken Tenders are a satisfying homemade favorite, with a golden crunchy shell and juicy chicken inside.
The simple buttermilk marinade adds flavor, while the seasoned flour-and-water batter creates a crisp coating that makes every bite delicious. With a few straightforward steps and careful frying, this recipe is manageable even for beginner cooks.
Serve these Chicken Tenders with fries, fresh vegetables, or favorite dipping sauces for a family meal everyone can enjoy. Try a batch at home, share them with friends and family, and enjoy the crunchy, savory goodness straight from the kitchen.
Leave a Reply